Once a year, Gateshead Library puts on some STEM event – an eDay or a Raspberry Pi Jam, or something like that. I have been exhibiting since about 2014. In September 2019 it was a Raspberry Pi Jam and I decided to show off my model house, fitted with lights, a temperature/humidity sensor and a servo motor controlled by an Arduino and a Raspberry Pi. I thought that this exhibit would also give me an idea of how the public responds to what I have to show.
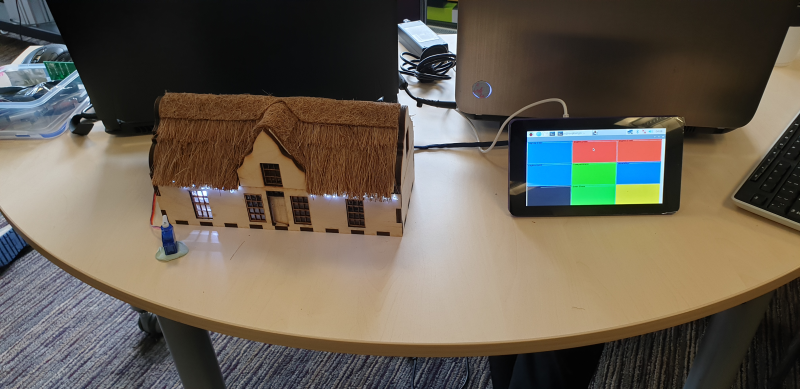 The model house is made from laser cut Birch plywood. For the thatch roof I used coconut fibre. The idea with the little blue stepper motor is that it will eventually open and close the front door. The lights are controlled by an Arduino micro pro and I wrote a little Java program that runs on a Raspberry Pi with a 7″ touch screen to allow the user to check the humidity, temperature, control the motor and switch the lights on and off.
I was worried that others might not think the house is all that interesting. But, I have to admit, the house is quite eye catching and quite a few people came over to look at the it.
At first I kept the house closed up, i.e. I didn’t take the roof off to show all the wiring. I didn’t think it was really in a state to show because it was all blue tac’ed together and not in a neat state. However, to my surprise, people found the guts of it all quite interesting too.
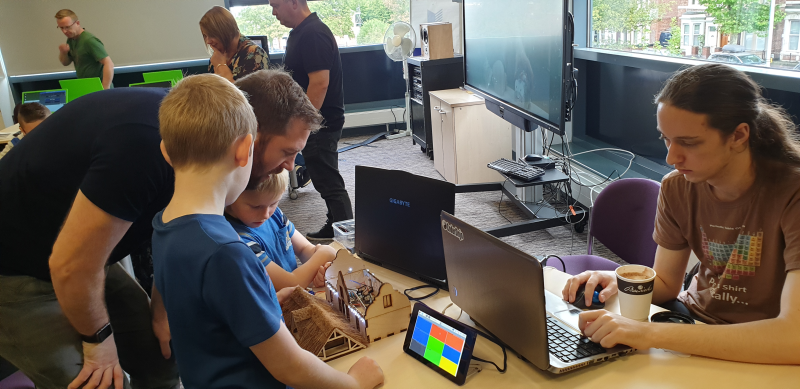 To my surprise kids found the inside workings of the house quite interesting.
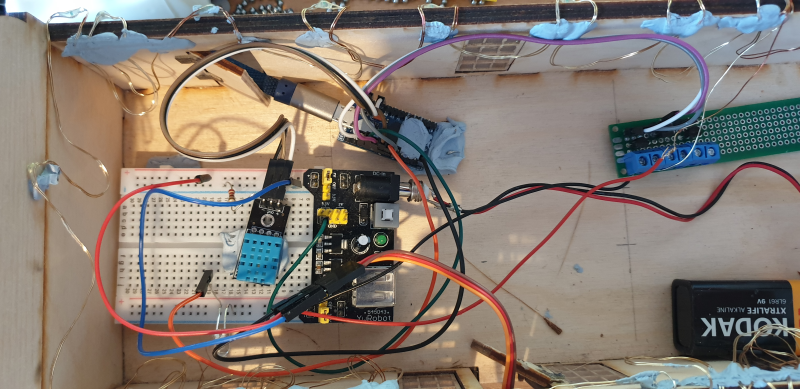 The inner workings: An Arduino micro pro driving a DHT11 sensor, a single LED, a fairy light strip (via a 2N222 transistor), a servo motor, a 9V battery and a power unit to convert 9V to 3.3V. The servo is not on the photo but its wires can be seen coming through the front door at the bottom of the photo.
The inner workings of the house consisted of an Arduino mico pro connected to a Raspberry Pi. The Arduino switches the fairy light strip on via a 2N222 transistor (i.e. on the green strip board to the right of the picture). There is also a single LED (slightly hidden by the red and blue wires in the front left), a servo motor and a DHT11 temperature/humidity sensor connected to the Arduino. The Arduino, single LED and sensor gets its power from the USB port but the rest get their power from the 9V battery via a little power unit on the breadboard.
A small Java program is used to display a simple dashboard of squares on a 7″ touch screen. Each square would be a switch to switch something on or off or to display the information published by a sensor.
All code is being made available on GitHub: https://github.com/jsteyn/Engineers. (Don’t worry, I’ll change the passwords on the final products)
Lessons learnt
I’m glad I did this exhibit as I learnt a few things.
- If possible, people will touch and disassemble.
- Anticipate touching and disassembling and either prevent it or make the model sturdy enough to cope with it.
- People found the inside and outside intriguing so it can all be shown off.
- There is a slight delay when switching things on via the touch screen. This causes one to press the buttons several times which in turn would switch the button between on/off states. A solution needs to be found to prevent this from happening.